Charging Box
Project Summary
This charging box is one of the projects assigned to me during my time as an Intern with Chaparral Star Academy. The project was given to me and a team of three other people with one month to complete it. Our task was to create some form of secure cabinet or box that only select students, who couldn't take their school-issued tablets home, could access to store and charge their Chromebooks overnight.
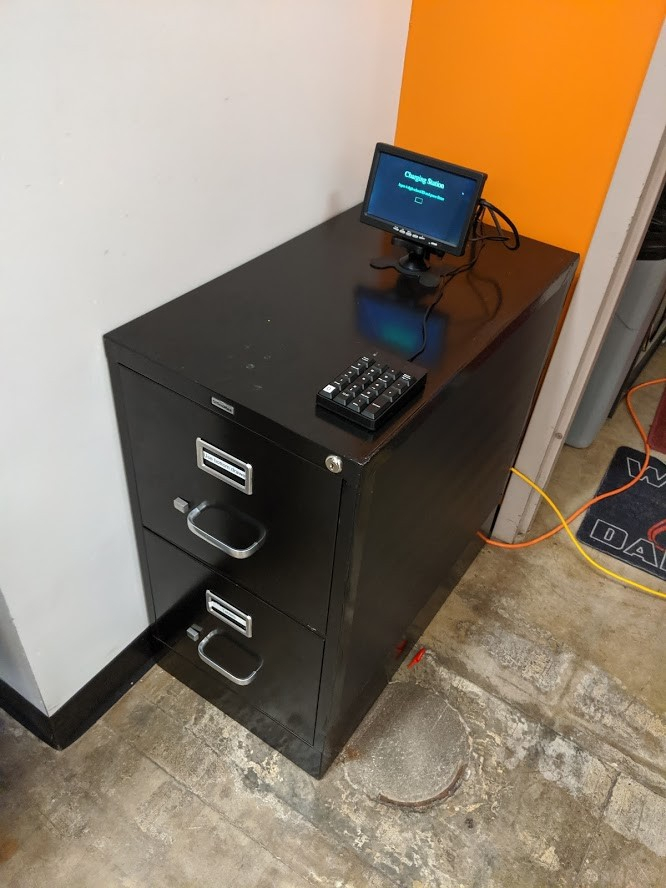
In the end, what we had created was an electronically accessed box that stays locked via a stepper motor in which the students can set their Chromebooks in and connect them to the chargers readily available and pre-installed inside. The user may access the contents of this box by inputting their student IDs (issued by the school for every student) and pass-codes (issued by our team) through a number keypad and small monitor.
What makes me so proud of this project is that it was my first time working with a team to create a physical, mechanical product. I had never worked with the hardware side of electronics to this degree before, so this experience taught me a lot about how software and hardware have to work together just as the people responsible for both sides do.
I don’t know what has become of the box now but I do know it was used for at least that entire school year without much issue. Unfortunately, after that was about when the pandemic hit and I wasn't able to return to that school but I have faith that it continued to be of use for years after.
- Languages Used:
- Python
- Engine: Built From Scratch
- Genre:
- Electronic Storage
- Front End Team:
- Jacob Meadows
- Gregory Clarke
- Back End Team:
- Riley Underwood
- Ammaar Siddiqui
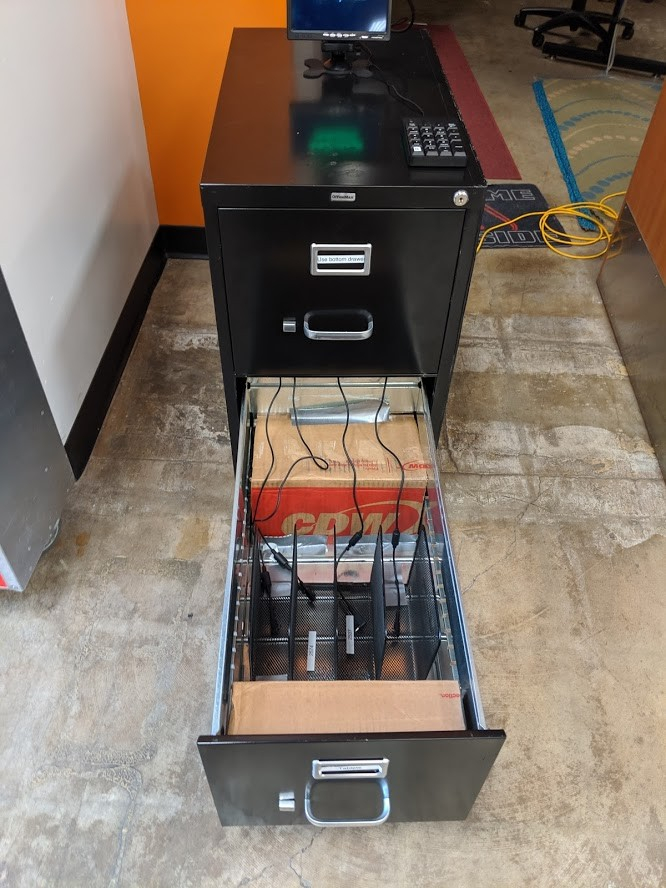
AssemblyGregory Clarke was in charge of making all of the components of the cabinet fit together and allowing the components to work in the most efficient manner possible. This involved drilling holes in strategic locations, placing components where they fit best and physically modifying the metal cabinet to suit our needs. Special attention was paid to the motor/locking mechanism. Other problems included the placement of the Raspberry Pi and the power strip so as not to impede the sliding mechanism of the cabinet. These parts were placed onto a cardboard shelf and attached to the top of the cabinet just above where the drawer would slide. All available space was utilized in order to complete this project.
User InterfaceJacob Meadows oversaw the creation of the GUI which was created in Pygame with no additional modules dedicated to graphics. This code was hosted independently on a Raspberry Pi programmable computer and displayed on a UOTOO 7 inch Small Portable HDMI Monitor. Over development, we ran into issues with the GUI, such as the cursor remaining on screen unnecessarily, inputted digits not deleting after the user's input, and many others. After the Charging Station was able to properly unlock, lock, open, and close, attention was shifted to those previously stated issues. As of version 1.0, all recognized issues have been dealt with.
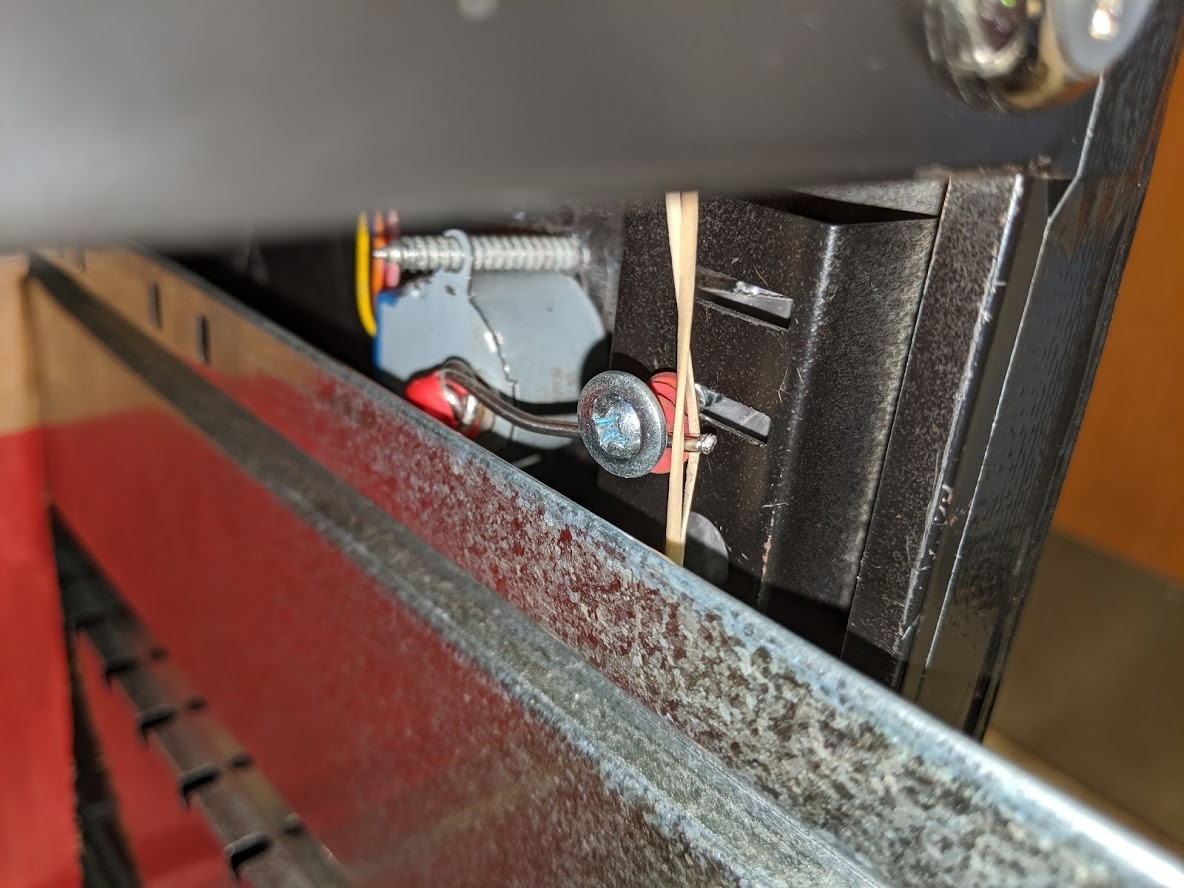
Motor ControlAmmaar Siddiqui's main focus was the locking mechanism of the cabinet. The idea was to lock and unlock the cabinet using a motor attached to the locking system inside the cabinet. Luckily for us, the lock could be turned from inside without the key being inserted. The motor didn't come with a lever and we had to ensure the lever length was perfect. We ended up using a thick metal clip and shaping it to match the size of the motor and used heat shrink to attach the lever to the motor. This alone, however, wasn't strong enough to lift the heavy bar that kept the cabinet locked on the inside. To address this issue, Gregory had the idea to employ a bit of physics and use a rubber band to help the motor lift the bar. The rubber band was attached to the top of the cabinet and the lever, giving the small motor extra strength to lift the bar.
Data StorageMy primary contribution to the making of this project was the code for confirming if the user was valid. Part of that task involved making compatible code with my colleague, Jacob’s interface. When the student enters their ID (unique to the school) and their password, my code runs through a list on a CSV file checking if both the student ID and the password are valid and unlocking the cabinet if so. If either the student ID or the password are not found in the file, the screen will return to the menu. The code also featured an option to add a new user to the list by manually inputting their student IDs while the system randomly and automatically generates a password for them. The part of the code for adding new users was easily my greatest challenge with the code, specifically because I have never worked with CSV files (writing and reading) using code until this point.
Extra InfoI also made the code for turning the motor and made sure it turned enough for both opening and closing the machine. Once the code was ready, my colleague, Ammaar Siddiqui worked to connect the motor to the Raspberry Pi. Finally, I made some minor additions by making two jingles for both when the cabinet opens and when it closes.